
Rebuilding my in dash air conditioning unit on a XJ Series-3 V12
Part 1 – Disassembly and Repair
Date work carried out: Sept/Oct/Nov 2015
The first part of this story is a lead into why I needed to remove and repair my in dash air conditioning unit known as the “air blend box”.
The moral of this story is when carrying out a total engine out rebuild on older cars with air conditioning it always pays to replace all the air conditioning hoses as a matter of course, as this was where my air conditioning problems stemmed from.
It’s the same thing as should you never put the same old radiator back in after a major engine rebuild without at least having a radiator shop remove the tanks and have the tubes cleaned out or better still just replace the whole radiator with a new one. The risk of overheating a new rebuilt engine is not worth it.
After reinstalling the rebuilt V12 motor (Feb-2013) I found that the heater wasn’t working, investigating the problem it was found that the small electric motor that drives a series of small cam shafts (sometimes referred to as the servo motor) wasn’t working. This unit is located on the right hand lower side of the air blend box and is accessed by removing the right hand forward tunnel cover and lower air tube.
The unit was removed and powered up and found to be working ok. Next, the relay box which is located on the lower left hand side of the air blend box again accessed by removing the tunnel cover and lower air tube. This relay has 12 electrical terminals on it which need to be removed then two retaining nuts which hold the unit in position. This was replaced with a second hand unit and I tested the system again. This time the servo motor started working as it should: problem fixed, heater working.
When the servo motor is working you can hear a whirring sound coming from the motor as it changes the series of cam positions depending on the temperature that has been set and the fan switch turned on, you can hear the whirring of the motor when you are travelling on a smooth road surface road surface eg hot mix smooth surface with the radio off all windows closed and nobody talking in the vehicle.
After a few months back on the road after the engine rebuild, I discovered that the heater sometimes didn’t work, all the above took place over a period of time March 2013 to around October 2014, and led up to my air conditioning problems.
I took my car to the National Rally at Wollongong, NSW in March 2013 (air con not working) and travelling up the Hume Highway in 38 – 40 degree heat we found out how hot the cabin of the car got. The V12 engines emit a lot of under bonnet heat with not much room in the engine bay for the heat to escape so it’s got to go somewhere.
Later in 2013 as the summer was approaching I decided to have the air con gassed up but found over a period of 3-4 days it lost it’s gas. The second time I had it looked at by a different guy who vacuumed the system down first to check for any leaks and found the re-gas input valve on the compressor had a small leak. The valve was replaced and re-gassed, plus special oil added to detect any leaks. Using infrared glasses, if there is any leakage, then it shows up as green in colour. A leak can’t be seen by the naked eye; only when wearing the infrared glasses.
I drove the car each day to check that the system was holding its gas. On the third day after returning home and lifting the bonnet I discovered that the metal pipe fitting on the return hose between the evaporator which is in the air blend box and the fuel cooling pipe on the engine was leaking (gas will leak from the point of least resistance, plug that point and it finds the next point of least resistance) that’s why it pays to replace all hoses on older vehicles before re-gassing the system.
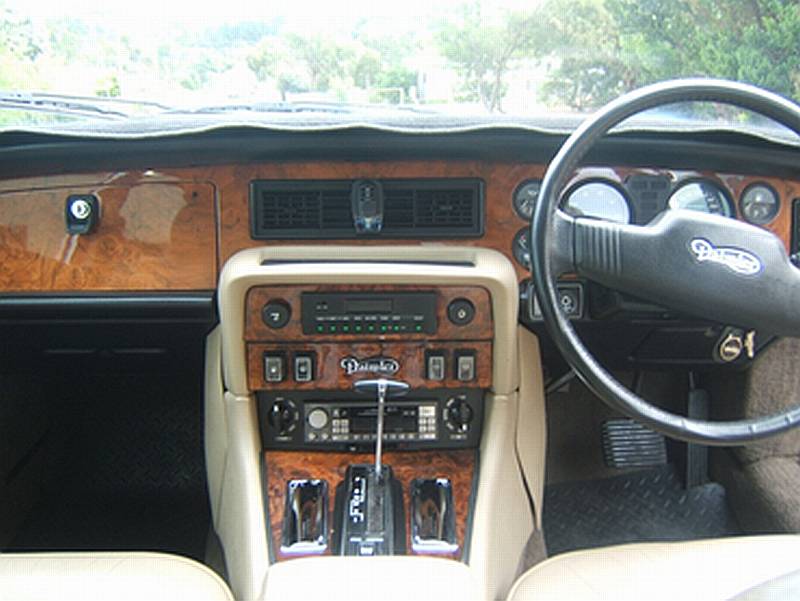
The beautiful dash in the XJ.
It has to come out !!
The next step was to remove the hose for replacement and this is where my reason for needing to remove the air blend box really started. The hose in question is connected to the return side of the evaporator right next to the expansion valve, commonly known as the TX valve. Being a V12 engine this valve is hard to remove but makes it easier to get spanners onto the hose nut and the 90 degree elbow that in turn is bronzed to the evaporator return pipe. Because it is impossible to get the spanner onto the square section elbow at 90 degrees and the other spanner on the hose nut, that has maybe never been removed since the car was built (1986) it wouldn’t budge. In the effort to undo the hose nut the elbow was bent and the pipe kinked and cracked just behind the elbow “disaster”, as the pipe is part of the evaporator and couldn’t be repaired in situ.
In hindsight, I should have used a small 240 volt grinder to slice the nut and break it away from the elbow thread. It would have been a simple job of replacing the hose and re-gassing the system. I had to grind the nut anyway to remove the hose from the elbow as the hole in the fire wall is not big enough to feed the hose through attached to the elbow.
This is the reason for needing to remove the air blend box to replace the evaporator unit so I could have air conditioning working again. It took several months for me to get my head around having a crack at undertaking quite a large job plus the fact that I had never done a job like this before and knew very little about air conditioning systems anyway.
The make of the air conditioning unit (air blend box) is Delanaire Mk-2 system and is fitted to XJ Series 1, 2 & 3 and early XJS models.
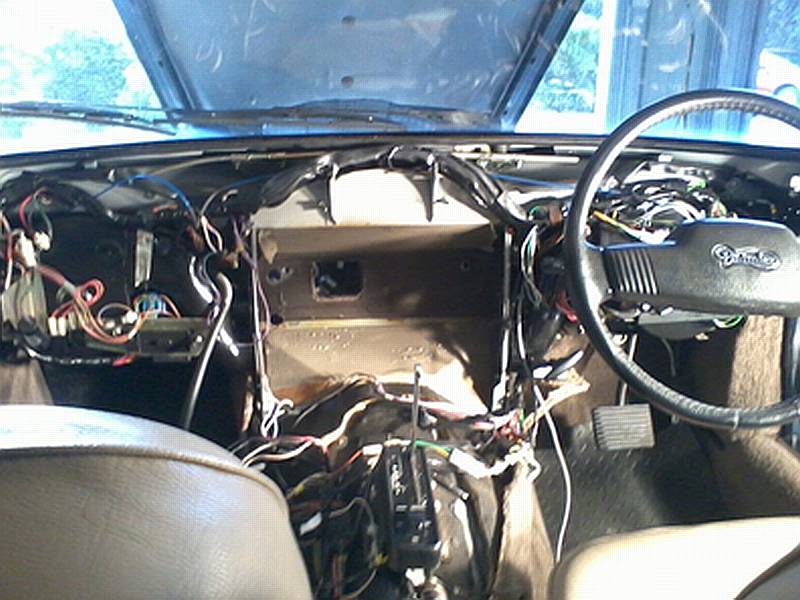
To remove the air blend box requires removing the dash pad, dash board, radio, complete centre console, all the air transfer tubing and disconnecting all the associated wiring just to get to the air blend box.
 Before removing this unit you need to disconnect some of the associated vacuum lines, remove the two hoses from the heater pipes in the engine bay, blow compressed air through the heater core to remove any access coolant, plus I removed the TX valve assembly as I wasn’t sure if it would fit through the hole in the fire wall and I didn’t want to damage it, and finally undo the two nuts that hold the unit in position on the fire wall. At this point, the unit is ready to be removed from the car. It takes two guys to remove the dash board assembly and the air blend box. After completing this task and having wires laying everywhere, I had my doubts whether I could get it all back together and working.
Next step was to remove the damaged evaporator unit, by removing the outer cover plate and the temperature probe from the side of the air blend box and the heater core assembly. That was simple enough by removing the end cover plate; a wiring harness; one of the flap lever arms and return spring. I took photos and marked reference points as I dismantled the unit, but more trouble loomed the heater core was showing signs of starting to leak. The outer sides of the core also have form glued to the surface to stop any metal to metal rattles the form had also decomposed badly because of age. I ordered a replacement unit from JagDaim in Melbourne and was assured it would fit. Ten days later I received the replacement unit but guess what, the core would fit but one of the pipes was completely the wrong shape which prevented it fitting as it should, the pipes need to be correctly shaped to fit around electrical pins and wiring and also pass between the air flow holes. If they are not correctly aligned the air tube adaptor pipes won’t align with the holes in the air blend box when you need to refit them later.
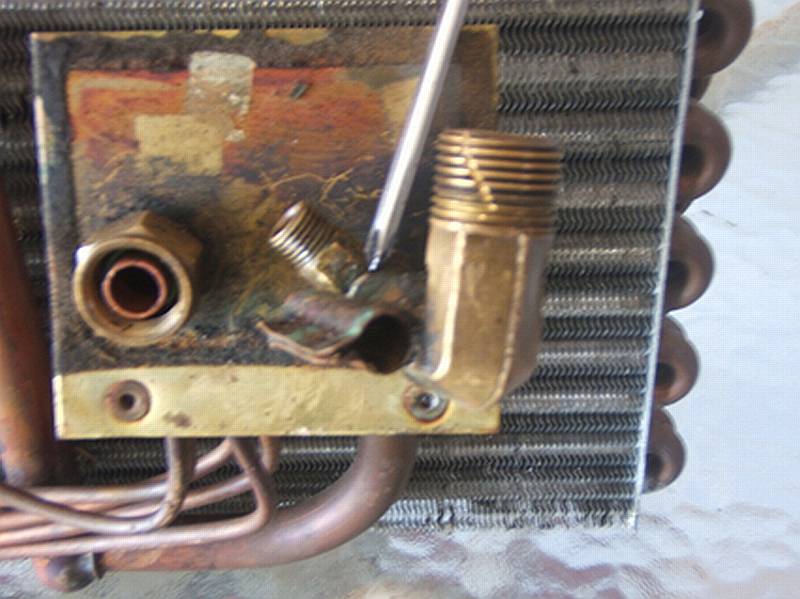
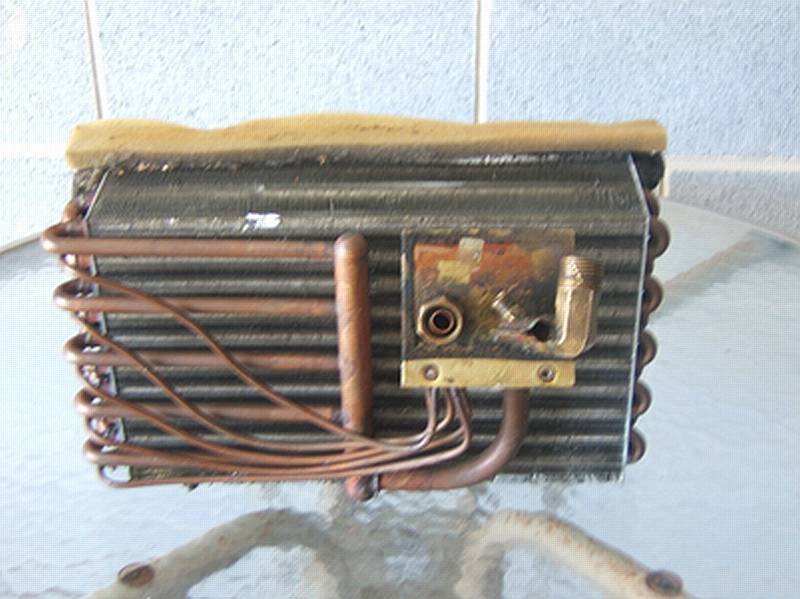
The damaged evaporator unit with bent elbow and cracked pipe.
 I returned the unit to JagDaim with them paying for the return freight cost without any problems. Next step was that I sent my heater assembly to V & A Spiteri in Melbourne who would arrange to have a new core fitted, this took three weeks. During this time, because all the form that is attached to all 5 air flaps was badly decomposing again and because of age, I decided to remove all flaps to replace the form.
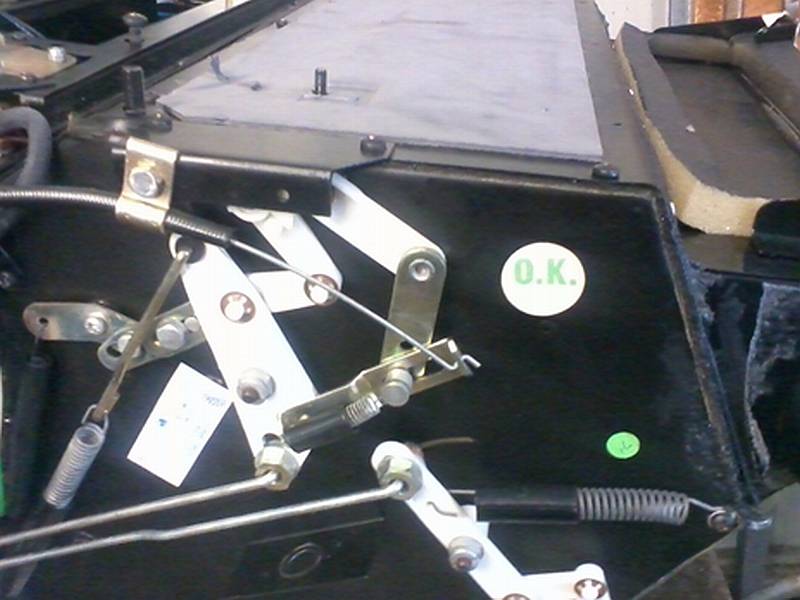
It’s a work of art to remove the flaps. Four of the flaps are moved by plastic linkages which are in turn connected to small connecting rods. I marked the position of the linkages and the rods which are next to the air blend box side covers with a coloured text pen, so I would know the correct position when reinstalling them. I also took more photos as a back-up.
Next step was to remove the back cover plate to expose the flaps, very carefully removing each flap plastic end bushes from the sides of the air blend box one at each end of the flap. This allows you to move the flap sideways, which allows one side pivot point to drop out of the bush retaining hole. Then you angle the flap to 45 degrees which allows you to remove it from the air blend box. You then repeat this process for the remaining flaps noting which flaps go where, as some flaps are not the same width but all are the same length. One flap has the form on the reverse side to the others. I also marked the flaps in the order that they came out as you install in the reverse order (are you still with me?).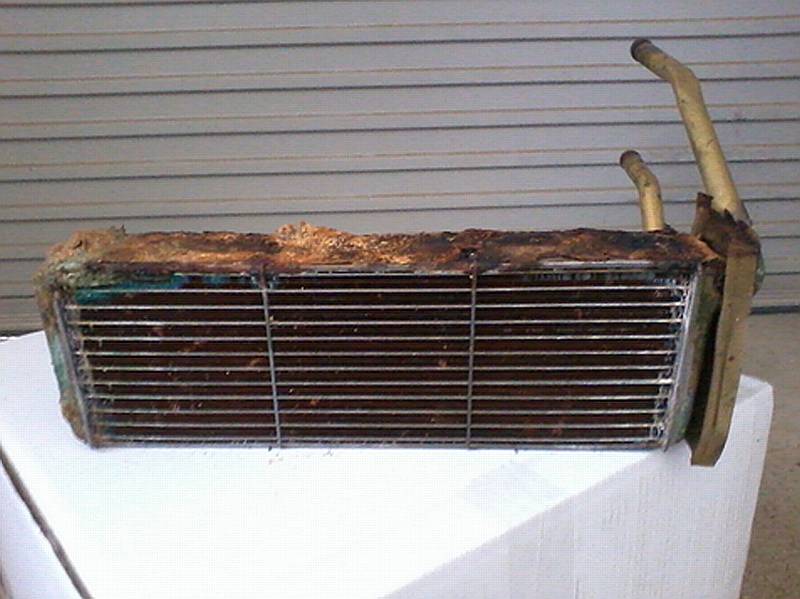
The heater core had seen better days.
Getting the air blend box connection correct.
Once all flaps are removed you need to remove all the old form, which is easy to do. I then cut to size some self adhesive 3mm form which I purchased from the Form Shop in Hobart and placed in position on all the flaps and reinstalled them. You need to do this in reverse of removing them as one flap won’t fit in behind the other if you get the process wrong. Once all flaps are in position you can then refit the end support bushes, plastic linkages, connecting rods and the small linkage return springs, quite straight forward if you have marked where things all go, but you will be in BIG trouble if you didn’t mark where things go or take photos.
Next time: the rebuild. How hard can it be?
– Harry Bluett
![]()