Two Heads are always better than One
Part 2: by Grant Rodman
This was the initial project – to refurbish Pearl’s original head, as it had done little mileage on new valves & guides before the engine was ‘parked’ under the bench many years ago.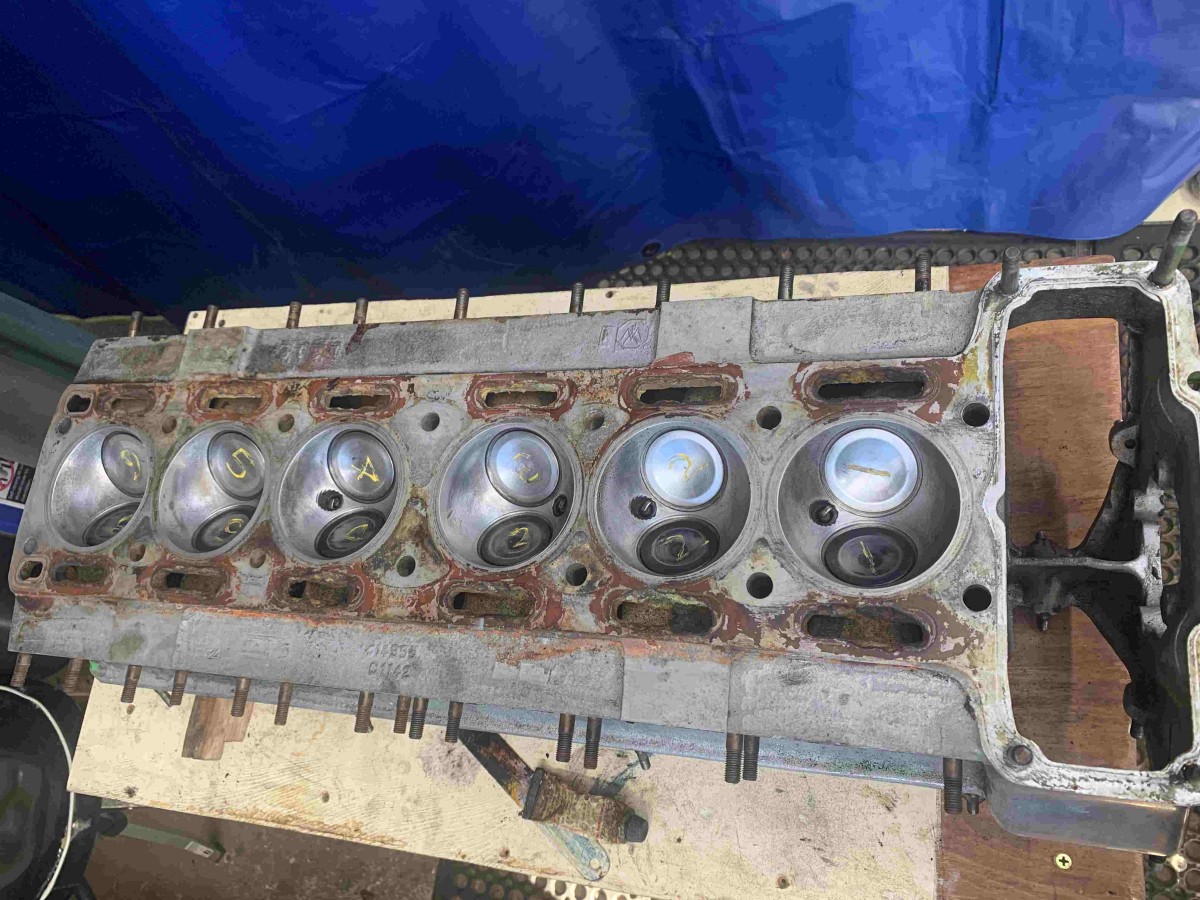
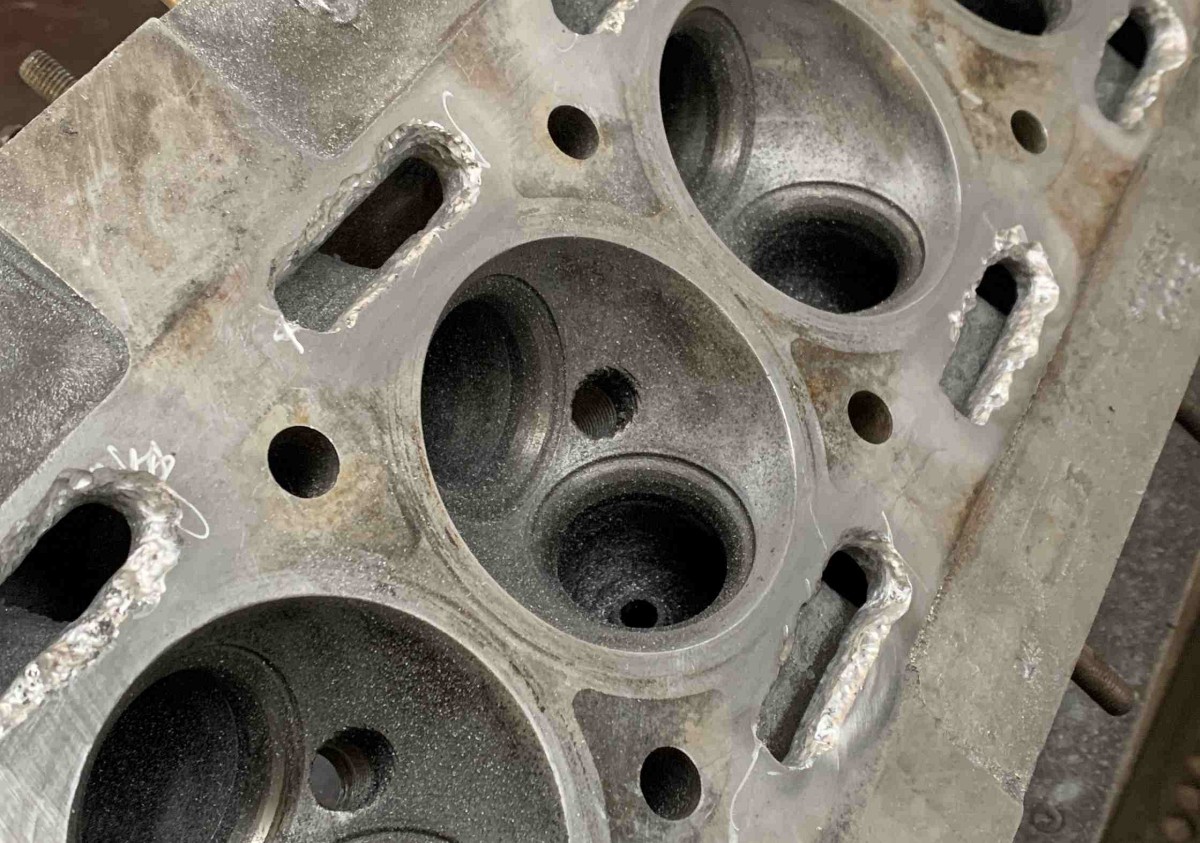
Unfortunately once removed from the engine, revealed the water jackets are now in need of major repair. After much research & advice, and with retirement at hand, I thought it would be a good ‘learning’ exercise to have a crack at fixing it myself.
Preparation is the key to a project like this!
 First Step: Remove ALL the oxidized metal, with Grit blast, Tungsten burrs, Dental burrs, and S/S wire brush
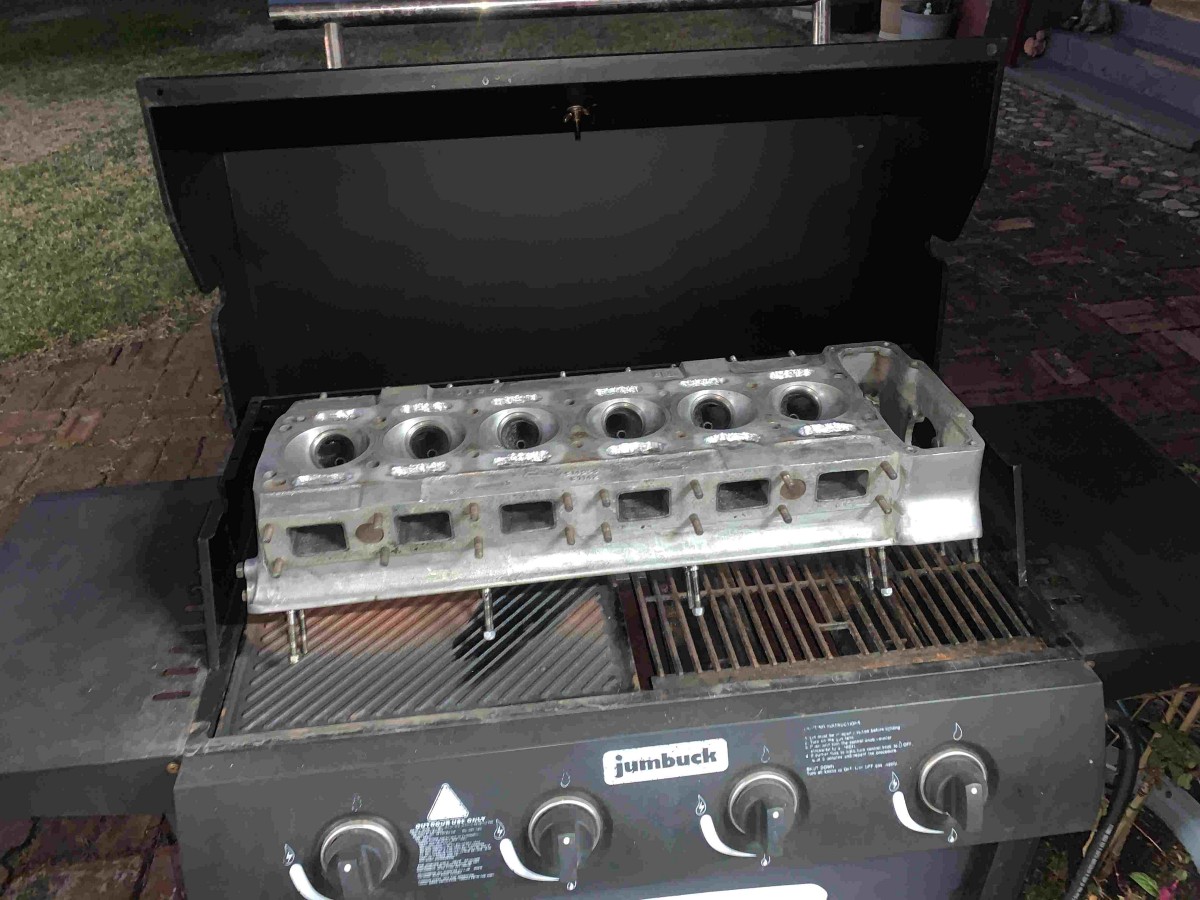
Next step is to find a way to pre-heat the head?
So it’s off to the tip shop with measuring tape for an old BBQ.
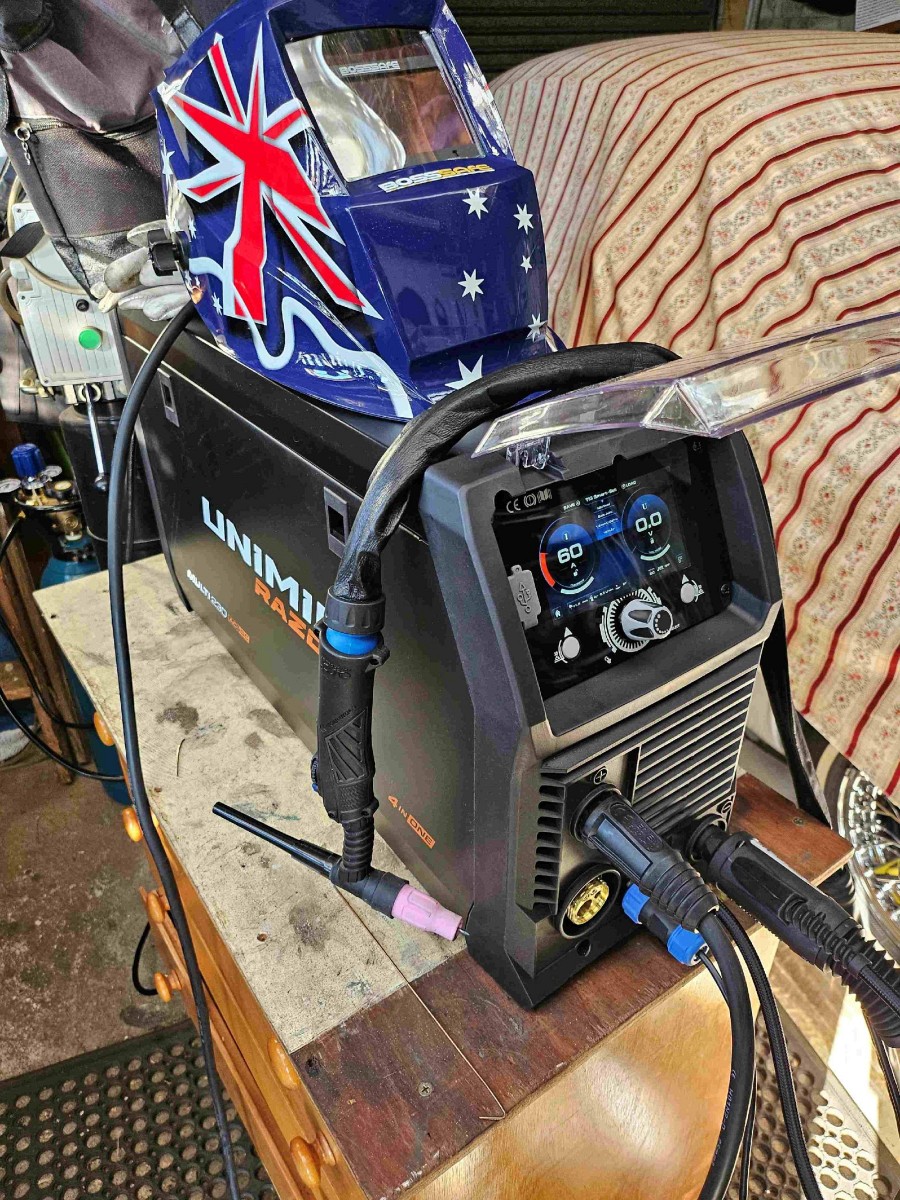 The next bit requires some serious welding kit.
“Happy Retirement” present to Grant from Grant! – Then it’s practice, practice, and more practice on scrap bits, with different filler rods, preheating temperatures (Always removing the gas bottle from the BBQ before operating the welder!) until I am comfortable with it all.
On the big day, the weld areas are cleaned again 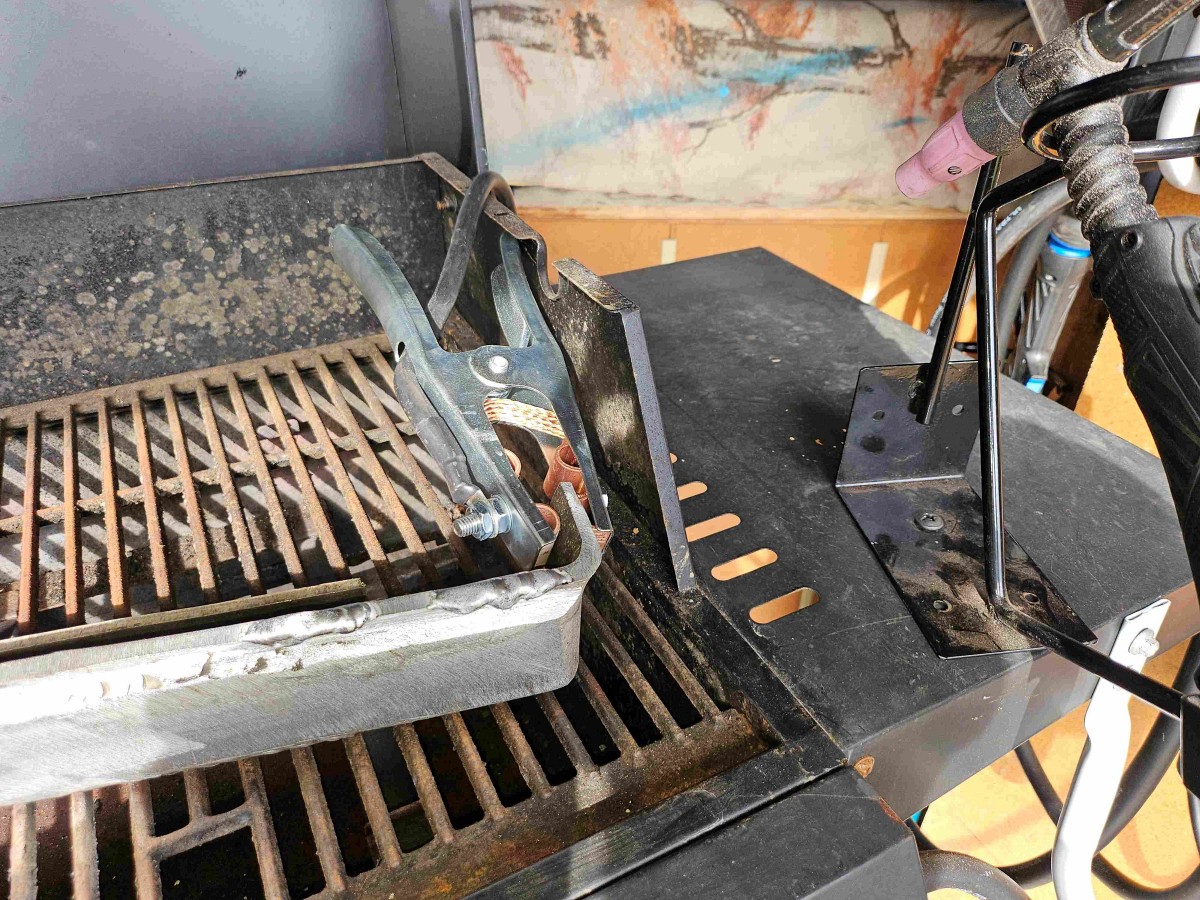 with (virgin) S/S rotary brushes, and the head is preheated to about 150°C, and welding commences in small runs in various places, while also keeping an eye on the head temperature, taking a break when it gets a little high. When complete, the BBQ is reconnected to stabilize the heat throughout the head, and left with the lid closed to cool overnight.
 The next day, the welds are hand dressed to within a few thou of the head surface, to look for porosity in the gasket zones, (or electrode tungsten contamination which has to be chiseled out) – the process is repeated again to repair the flaws found. Finally, the galleries are tidied up with a router to their original profile.
Even though I made every attempt to keep 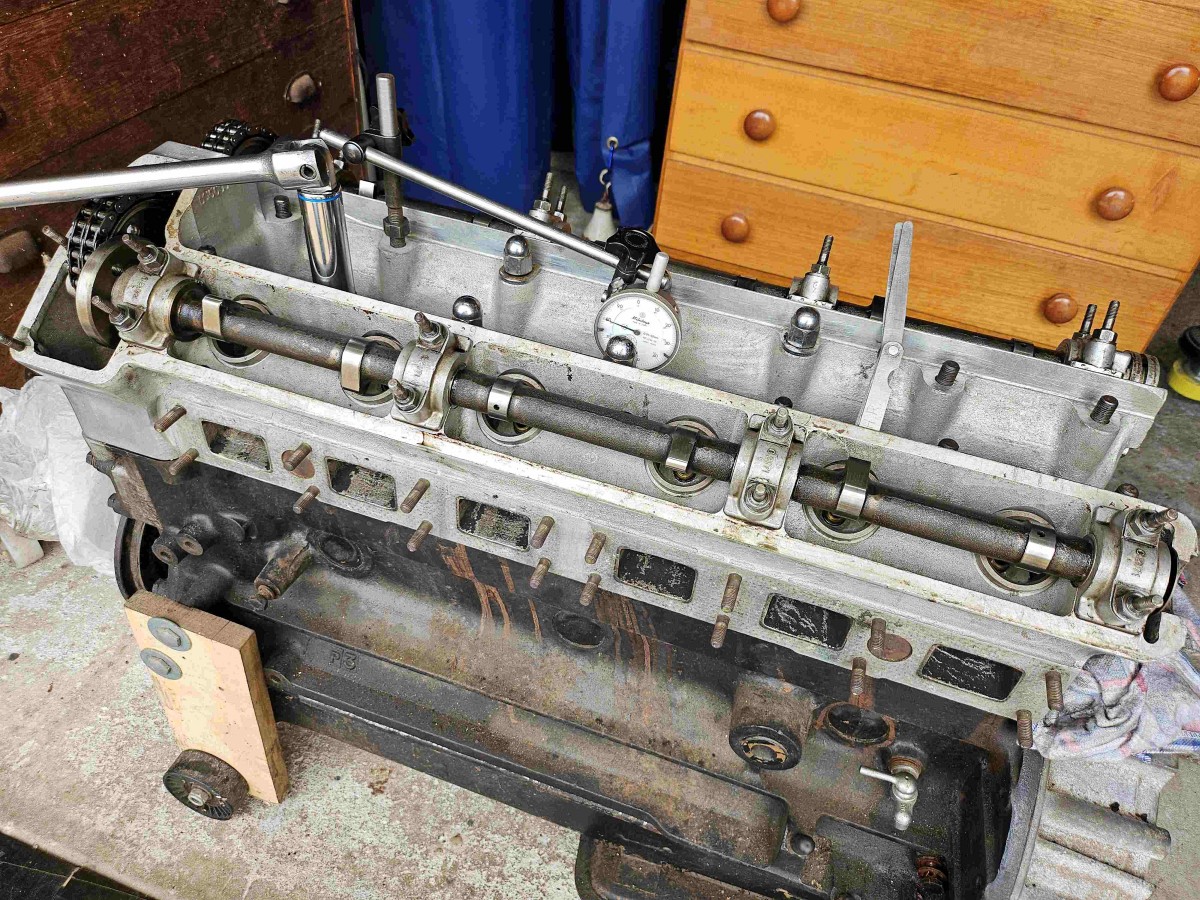 distortion to a minimum, the old “Power-of-Contraction exceeds the Power-of-Expansion” rule still caused a bit. In hindsight, I could have made a ‘strongback’ out of something like a bit of railway iron or H beam – but then getting it all to fit in the BBQ would have been an issue!
To straighten it, I sat the head back on the block with packers, measured the distortion with feeler gauges, and gradually tweaked the head down until a parallel bar sat proper in the cam tunnels. To confirm, the cams are installed to check they spun freely. Now that I had a base point, I set the dial gauge to zero, (removed the cams) then tighten/released the head studs until it “returned to zero” with the head loose on the block.
Final confirmation was refitting the cams with caps torqued to spec and checked that they still spun freely while sitting on the bench.
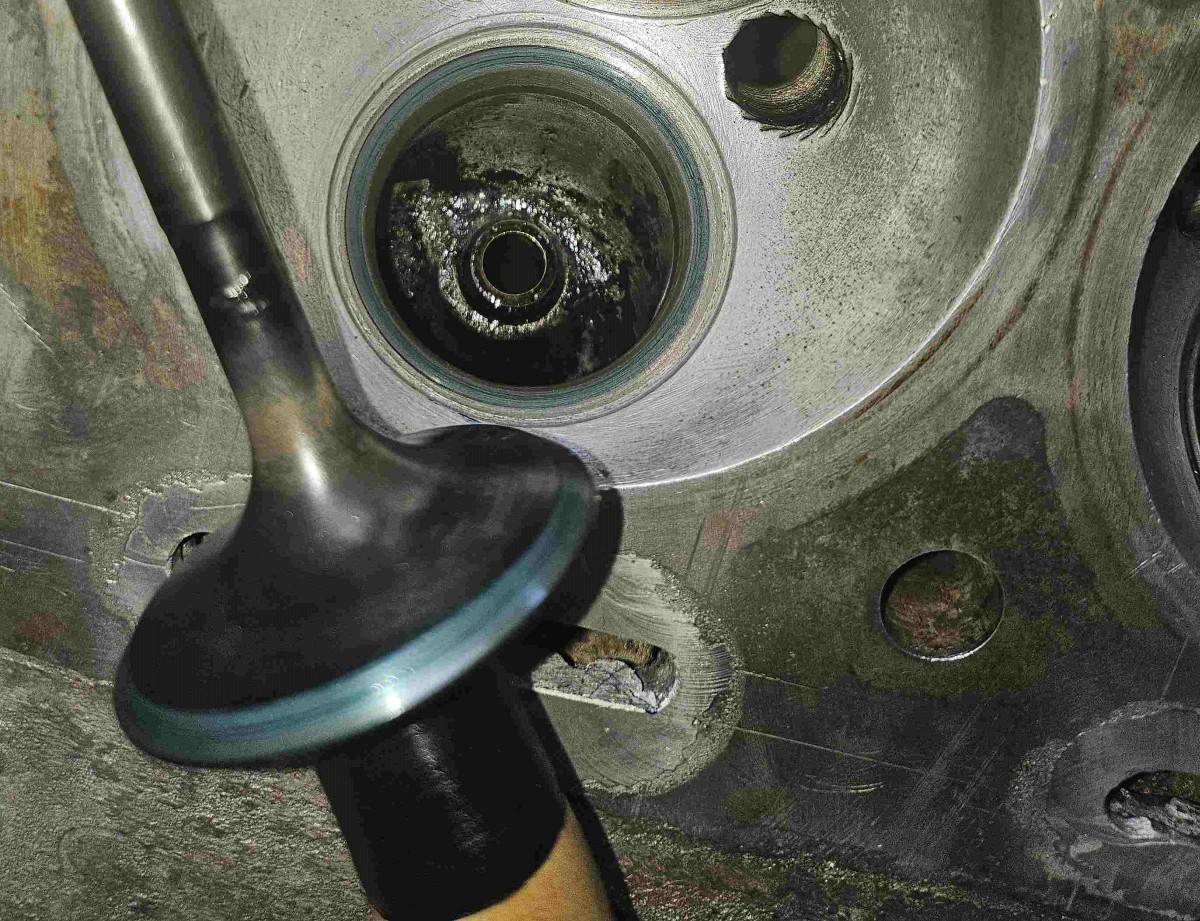 Next step is lapping the valves, I have to be a little careful here, the people who did the valve seats for me many years ago made a right mess of it, and I had to ‘pull every rabbit out of the hat’ to get the valve clearances right even back then!
Deviating from the ‘norm’ again, 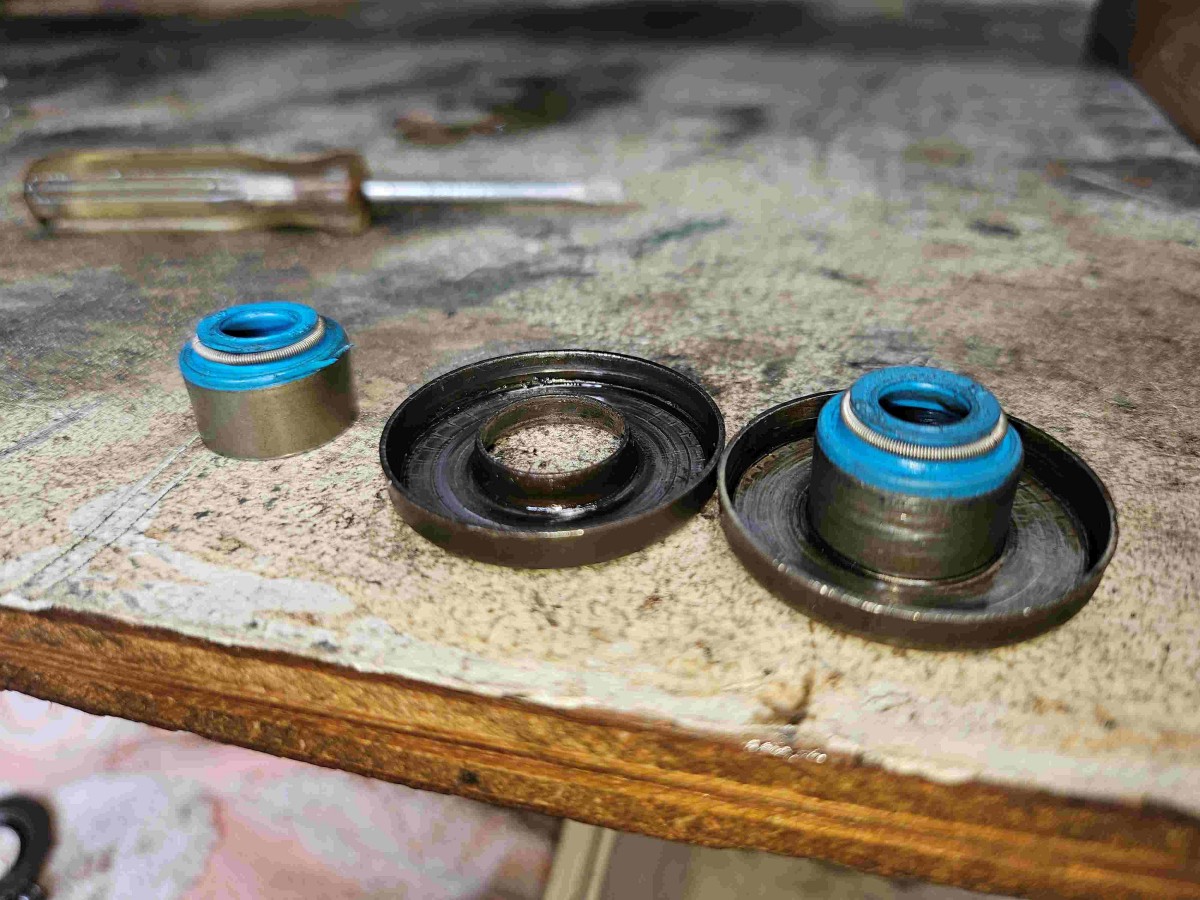 I am going to try and fit modern valve-stem seals on both inlet & exhaust – as this early head has the ‘long’ collets & retainers, it will be challenging, but after measuring the valve travel of every valve with-out the springs fitted, it is ‘doable’ if the seals are shortened.
 Even though the original tappets ‘measure-up’ ok, the tops could do with a lap (this will also help with regaining some shimming capacity). Even though my lathe is old, but when it comes to grinding on it, everything gets covered for protection!
Normally the next step would to get the head planed ready for assembly, but as I have no intention of using it (but will keep it, as the numbers match the car), I will re-assemble it as is, and if ever needed, will then get it ‘planed with valves fitted’ (just means a bit more care to keep the swarf at bay).
Onto the next project!
Cheers Grant
![]()